
Private Calligraphy Tutoring in Bali
Calligraphy Tutoring in Bali: The Nib Angle Decides the Letter
Calligraphy tutoring in Bali from Edupola pairs one teacher with one learner at home. The shape of a letter comes from the nib and not from the hand that is trying hard, and 6 consequences follow. Fees from IDR 120,900 per session.
Rating and fees for calligraphy tutoring in Bali
| Programme | Calligraphy Tutoring in Bali |
|---|---|
| Provider | Edupola |
| Description | Private calligraphy tutoring in Bali, one teacher per learner: the nib angle makes the letter, so lines are drilled before any letter is written. |
| Fee | Fees start from Rp120,900 per session. |
| Session Length | Sessions run 60, 90, or 120 minutes. |
| Schedule | Flexible, following the learner's calendar. |
| Start | Lessons can start any time after registration. |
| Sessions per Month | 4 to 20 sessions per month, as needed. |
| Rating | 4.9 out of 5, 106 reviews |
Programme at a Glance
Calligraphy Tutoring in Bali and the Tool That Shapes the Letter
Calligraphy tutoring in Bali runs one tutor with one learner, at your home. One fact decides what the early sessions contain, and it surprises almost every beginner.
The letter is not made by the hand. It is made by a broad nib held at a fixed angle to the baseline, and the angle differs for each script. Thick and thin come from the direction the stroke travels against that nib, which means pressing harder to thicken a stroke damages it instead of widening it. The hand's job is to hold the angle and move.
So plain lines come first: straight, curved, and wavy, all at the same angle. That part feels furthest from calligraphy and it is the part that decides how every letter afterwards looks. Fees start from IDR 120,900 per 60-minute session, with 4 to 28 sessions a month. This programme holds a 4.9 out of 5 rating across 106 learner reviews in Bali.
Consequences
Six Things That Follow From the Nib Making the Shape
Each item below follows from the letter coming out of the nib. Together they are the first weeks of calligraphy tutoring in Bali.
-
The Angle Is Held Through the Stroke
The nib is held at a fixed angle to the baseline, and that angle differs for each script. A wrist that rotates mid-stroke produces a letter with thick and thin in the wrong places.
-
Thick and Thin Come From Direction
A stroke thickens when it travels across the nib and thins when it travels along it. Learners who press harder to thicken a stroke damage the nib and tear the paper.
-
The Pen Is Pulled, Never Pushed
The pen moves towards the body or sideways, and is never pushed forwards. Pushing makes the nib tip scratch the paper and then spray ink across the line.
-
Stroke Order Is Already Fixed
Every letter has a set order of strokes, and that order is what makes the joins between letters fall cleanly. Writing in your own order produces letters that look right alone and wrong together.
-
Seating and Paper Position Are Set Too
The paper is tilted and the arm is placed so the angle can be held without rotating the wrist. Learners who correct the angle by turning the hand build a habit that stops them later.
-
Lines Before Letters
The first several sessions are straight, curved, and wavy lines at one angle. This is the part that feels furthest from calligraphy and the part that decides everything after it.
Scripts
Scripts Available and What Each One Demands
This table is what calligraphy tutors in Bali use to help a learner choose. The style decides the pen angle, the letter size, and the tools, so it is settled at the consultation.
| Script | Its character | What it demands |
|---|---|---|
| Naskhi khat | Clear and readable letters, used in manuscripts and books; usually the first script learned | Accuracy of size and patience, since a small error is immediately visible on tidy letters |
| Tsuluts khat | Large assertive letters with ornament, used for titles and wall pieces | Command of the angle across long strokes, and a wider nib |
| Diwani khat | Curved letters joined closely, used in formal documents and ornament | A supple hand, and holding the angle through a sharp curve |
| Hand lettering | Latin letters drawn as shapes, used on cards, signs, and posts | A feel for the space between letters, and here the outline really is drawn and then filled |
| Brush pen | Latin letters whose thick and thin come from brush pressure, used for fluid writing | Fine pressure control, because here it is pressure that forms the weight |
| Illumination | Ornament around the writing: borders, vines, and gold | Patience with small work, and the correct order of colouring |
Learning Path
The Order of Material From Line to Finished Work
The calligraphy stage a learner starts at is set by a few lines drawn in the first session, never by how neat their handwriting is.
-
Stage 1
Lines and the Angle
Straight, curved, and wavy lines drawn with the nib angle held constant, together with setting the paper and the arm. No letter is written at this stage at all.
- One held angle
- Paper and arm
- No letters yet
-
Stage 2
Single Letters and Their Size
Letters written one at a time with the size counted using the nib dot as the unit. Each letter is repeated row after row, because what is wanted is consistency.
- The nib dot unit
- Rows of repeats
- Consistency
-
Stage 3
Joins and Words
Letters joined into words, where the stroke order proves why it matters. Spacing and the placement of dots are set, and learners start writing real lines.
- Stroke order
- Spacing
- Dot placement
-
Stage 4
Composition and Ornament
One whole work assembled: choosing the text, dividing the space, laying out the lines, then ornament if wanted. This stage turns tidy letters into a piece.
- Dividing the space
- Line layout
- Ornament
Who It Is For
Learners Who Take Calligraphy Lessons in Bali
Every session holds one learner, so the script and the tools are chosen with that learner.
-
Competition Entrants
Learners in Bali entering school or regional contests. Sessions are planned backwards from the date, with one script worked until it is uniform.
-
Teachers and Religious Students
Learners in Bali writing boards, worksheets, and ornament for where they teach. Clear readable Naskhi takes the larger share.
-
Card and Sign Makers
Learners in Bali taking commissions for events. Hand lettering and brush pen carry the sessions, with attention to spacing.
-
Learners Seeking Calm
Learners in Bali who chose this as a settling activity. Sessions carry no contest target, and the line drills are given more room.
-
Artists and Designers
Learners in Bali already used to drawing who want lettering inside their work. Holding the pen is passed quickly.
-
Children and Teenagers
Learners of school age in Bali drawn to beautiful writing. Tools are chosen for small hands, and a short piece is finished early.
One Session
Inside a 60-Minute Calligraphy Session
This is the division used once a learner is writing letters. The first block is inside the session because the ink itself decides the result.
-
5 minutes
Preparing the Tools and the Ink
The nib is fitted, the ink stirred, and the paper angled. Ink that is too thick or too thin changes the stroke, so its consistency is checked on scrap first.
-
10 minutes
Warm-Up Lines
Several rows of straight and curved lines at the same angle. This block also checks whether the learner's grip still holds the angle.
-
25 minutes
One Letter or One Join
A new letter or a single join worked row after row. The teacher marks which rows drift in size, and the learner repeats those.
-
15 minutes
Comparing Against the Model
The learner's sheet is stacked on or placed beside the reference, and the differences are pointed out one by one. Side by side is far more honest than memory.
-
5 minutes
Setting the Home Practice
The teacher names the letter or line to drill alone and how many rows, with the one thing to watch for while doing it.
In a 90 or 120 minute session, a whole composition is laid out and started while the ink and the angle stay consistent, which is what learners working on illumination or a competition piece usually choose.
Prepared by the Learner
The Tools and the Place That Need to Be There
The admin confirms these once the schedule for calligraphy tutoring in Bali is agreed. A broad-edged pen, calligraphy ink, and smooth paper are prepared by the learner and not included in the fee.
-
A Broad-Edged Pen
A pen with a flat broad nib, matched to the chosen script: wider for Tsuluts, smaller for Naskhi. The teacher names the right width at the consultation, so nothing is bought twice.
-
Ink and a Small Pot
Calligraphy ink with a small container. The consistency of the ink decides the stroke, so it is tested on scrap before writing, and ink that has thickened is thinned a little.
-
Paper That Does Not Over-Absorb
Smooth paper that does not let the ink spread. Ordinary writing paper gives the stroke a furry edge, and learners blame their grip for what the paper did.
-
Grid Paper for Sizing
Grid or guide-lined paper at the early stages. Letter height is counted in nib dots, and guide lines help a learner see consistency without being told.
-
A Flat Table and Light From the Front
A table wide enough to lay the arm out, and light falling from the front. Light from behind puts your hand's shadow over the stroke you are drawing.
If you have not chosen a script, say so during the consultation. Most learners start in Naskhi or hand lettering, and the teacher names the nib width before anything is bought.
Proportion
Letter Size Is Counted in Nib Dots
Arabic calligraphy has its own unit of measurement, and the unit is made by the pen itself. The nib is pressed once without moving, leaving a diamond-shaped mark, and that mark is used as one dot. The height and width of every letter is stated in dots, so the rule is a proportion instead of a measurement in millimetres.
The consequence is that letter size is always matched to the pen in use. A learner moving to a wider nib has nothing new to memorise: the dot grows with it and the whole set of proportions holds. This is what lets the rules of calligraphy pass down without any measuring instrument at all, and it is why a beginner's first exercise is pressing a dot.
Measuring it is simple and repeated often: the learner writes a letter, then stacks dot marks along its height to check. Learners who get used to checking their own work move faster in calligraphy tutoring in Bali, because they no longer have to wait for the teacher to find out which row drifted.
What Learners Say
Stories From Calligraphy Learners in Bali
The quotes below come from learners in Bali who completed the calligraphy programme at Edupola, with their situation and what changed.
-
★★★★★
I could already write basic khat but I wanted to go deeper into Tsuluts and illumination. After 10 sessions at Edupola my work rose a level dramatically. Now I am trusted to decorate calligraphy in the large mosques of Bali.
Took on mosque calligraphy in 3 regencies
Dharma P.
Mosque decorator and calligrapher · Verified learner
-
★★★★★
Adding hand lettering and modern calligraphy to my invitation portfolio was the best decision. My coach at Edupola taught brush pen and pointed pen techniques that I applied straight away. Clients really love the calligraphy touch on their invitations.
Invitation revenue doubled after adding calligraphy
Ayu L.
Wedding invitation designer · Verified learner
-
★★★★★
At first it was only a casual hobby, but the calligrapher at Edupola guided me in great detail. From basic strokes right up to the composition of a whole work. I was so proud when my Diwani khat piece was selected for a gallery in Ubud.
Work selected for a local art exhibition
Mahendra
Hobbyist artist and collector · Verified learner
-
★★★★★
As a boarding school teacher I wanted to deepen my Naskhi and Tsuluts so I could teach the pupils better. Edupola gave me very structured technical guidance. Now my pupils enter province-level calligraphy competitions.
Calligraphy teaching at the school improved sharply
Ustadz F.
Islamic boarding school teacher and khat instructor · Verified learner
-
★★★★★
As a graphic designer, hand lettering skill adds extraordinary value. My Edupola coach taught brush pen and digital calligraphy techniques that were immediately applicable to logo and branding projects. Clients really appreciate this personal touch.
Added custom lettering to a design portfolio
Dian P.
Graphic designer and lettering artist · Verified learner
-
★★★★★
For me calligraphy is meditation. Every stroke of the pen demands extraordinary focus and calm. My coach at Edupola understands this approach and teaches calligraphy technique that also settles the mind. My journaling is far more beautiful and meaningful now.
Combines calligraphy with a daily meditation practice
Ratna D.
Mindfulness and journaling practitioner · Verified learner
Climate
Humid Air in Bali and Ink That Dries Slowly
Calligraphy ink dries by evaporating, so the air around it helps decide the result. In the humidity of Bali a stroke stays wet longer than it does in dry air, and an arm moving across an earlier row can smear it. Beginners often read this as a fault in their own hand.
Two habits settle it. First, work from the top row downwards with a protective sheet under the arm, so the arm never touches a stroke that is still wet. Second, allow drying time before the work is moved, and this is the one learners skip most, usually on the day they finish something they are pleased with.
Humid air also changes the consistency of ink in an open pot, and thinner ink spreads on the paper. So the pot is closed when it is not in use, and the consistency is checked on scrap at the start of every session. For storing finished work, keep it flat and out of a room where the air sits still.
How to Register
Four Steps to the First Calligraphy Session
The opening consultation carries no fee. The admin asks which script you want and what the writing is for.
-
Name the Script and the Purpose
The script you want to learn and what the writing is for: a contest, teaching, commissions, or your own pleasure. Both decide the tools.
-
Agree the Schedule
Days, times, session length, and sessions per month are agreed with the admin, following the rows of home practice between sessions, since consistency here comes from repetition and not from longer sessions.
-
Matching the Teacher
The team looks for a tutor whose travel to your location in Bali stays short, and that search runs 1 to 5 working days. Khat, hand lettering, and illumination are matched to teachers who work in them, because they are separate crafts.
-
The First Session
You draw a few lines with a broad-edged pen while the teacher checks your grip and paper position, then the starting stage is set.
Need help? Contact our admin on WhatsApp for a free consultation.
Documentation
Calligraphy Lessons With Edupola in Bali
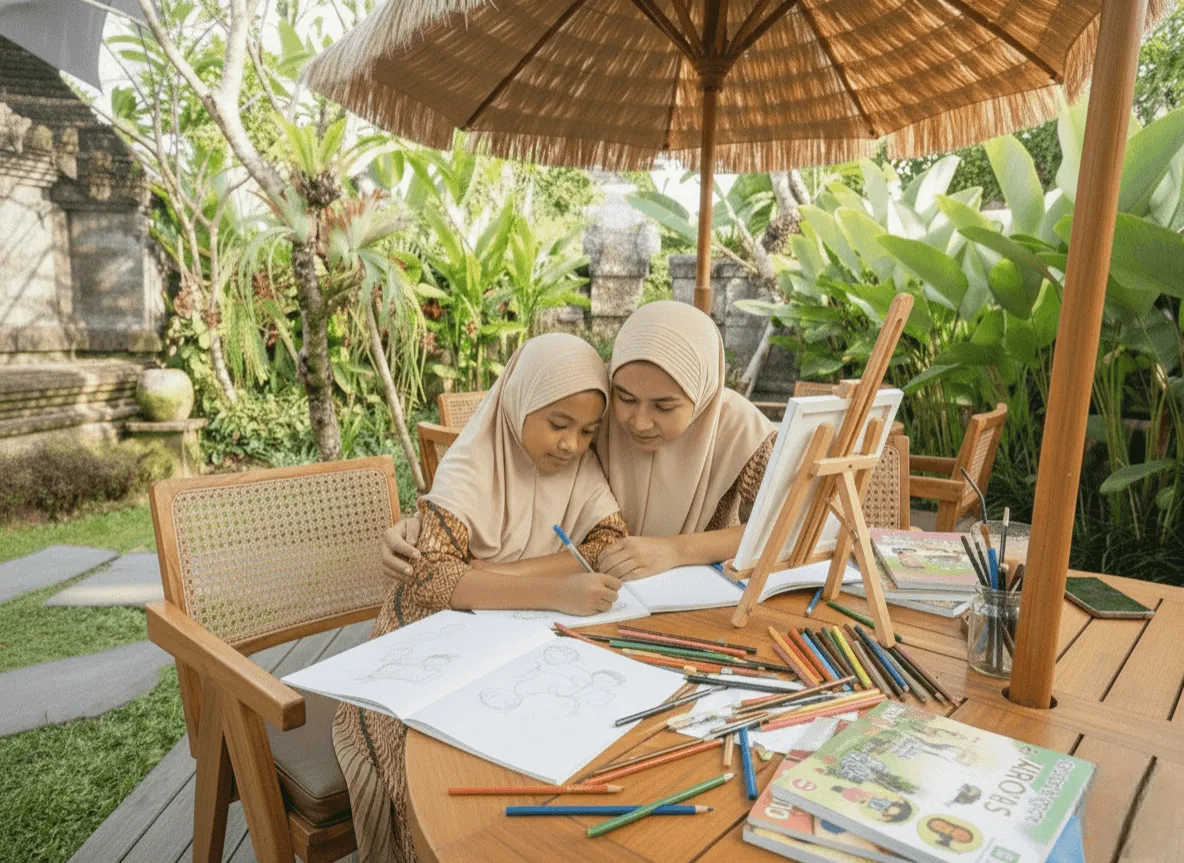
The photographs below were taken during calligraphy tutoring in Bali sessions with learners on the island.




Service Area
Where Edupola Calligraphy Teachers Travel in Bali
Tutors for calligraphy tutoring in Bali travel to the location you choose, from Denpasar, Badung, and Gianyar through to Tabanan, Buleleng, Klungkung, Bangli, Karangasem, and Jembrana. This programme asks the least of a room among the craft programmes: a flat table, light from the front, and space to lay the arm out.
What really decides the match is the script chosen. A teacher who commands khat is a different teacher from one who works in hand lettering and brush pen, so naming the script at the consultation speeds up the search far more than naming your preferred hour.
The Edupola office is not used as a lesson venue. Where no tutor is available near you, sessions run online. Most of this programme transfers online with one condition, as the next section explains. Ask the admin about teacher coverage at your location in Bali.
Online Sessions
Online Calligraphy Sessions and Where the Camera Points
Online sessions for calligraphy tutoring in Bali run over Zoom or Google Meet, and whether it works depends on one simple thing: where the camera points. It needs to see the paper from above instead of the learner's face, because what is being judged is the stroke and the nib angle.
With that framing, almost everything works. The teacher can see the angle, the direction of the stroke, and the consistency of the size, and can name which row drifted. Practice sheets are photographed and sent too, and the teacher marks the part to correct on the photograph itself.
What needs a room is correcting the grip by touch and checking ink consistency and paper type close up. Both are usually settled in the first few sessions, after which the online route runs without obstruction. Fees for online sessions match face-to-face sessions.
Frequently Asked
Questions From Calligraphy Learners in Bali
What does private calligraphy tutoring in Bali cost?
Fees start from IDR 120,900 for a 60-minute session, the shortest option. Sessions of 90 and 120 minutes are available with the fee following the length. The final fee follows session length and the number of sessions per month, between 4 and 28. The admin sends the breakdown in writing before the first payment. A broad-edged pen, calligraphy ink, and smooth paper are prepared by the learner and not included in the fee.
My handwriting is poor. Can I still learn calligraphy?
Yes, and the two are less related than people assume. Handwriting is fast and personal; calligraphy is slow and built from a fixed stroke order at a held angle. Learners with untidy handwriting are often at an advantage, because they have no habit of speed to unlearn. What decides progress is whether you will drill rows of lines before writing letters.
Why is the weight of my strokes uneven?
Almost always the angle, and not the pressure. Thick and thin come from the direction the stroke travels against the nib, so if the wrist rotates part way through, the weight lands in the wrong place. Learners who try to fix it by pressing harder damage the nib and tear the paper instead. The warm-up lines at the start of each session exist to catch this.
Which script should be learned first?
Naskhi for learners heading towards khat, because its letters are clear and readable and errors show immediately, which makes it an honest teacher. Hand lettering for learners who want Latin letters for cards, signs, and posts. Tsuluts and Diwani are usually taken after Naskhi, since both demand holding the angle through long strokes and sharp curves.
What tools do I need to buy to start?
A broad-edged pen in the width the teacher names, calligraphy ink with a small pot, smooth paper that does not let the ink spread, and grid paper for the early stages. The width depends on the script, which is why the script is named at the consultation. Tools and materials are the learner's own and are not included in the lesson fee.
How is a calligraphy teacher matched to a learner?
The schedule is settled first during the consultation, covering days, times, session length, and sessions per month. The Edupola team then looks for a tutor whose travel to your location in Bali stays short, and that search runs 1 to 5 working days. The script matters most here: khat, hand lettering, brush pen, and illumination are matched to teachers who work in them. If the first 2 weeks feel like a poor fit, a replacement is arranged at no extra cost.
Related Programmes
Other Programmes Learners Add in Bali
Learners taking calligraphy tutoring in Bali often add one other programme, usually once a first piece is finished.
-

Arabic Tutoring in Bali
Taken by khat learners who want to understand the text they write, instead of its letter shapes alone.
-

Drawing Tutoring in Bali
A choice for learners working on illumination and ornament around their writing.
-

Graphic Design Tutoring in Bali
Often taken by learners whose work is scanned and then used for cards, packaging, or posts.
Get Started
Start From Holding the Nib Angle
Name the script you want and what the writing is for. A tutor in Bali is matched within 1 to 5 working days.